Tuesday, May 31, 2011

Go watch this now! (Waste Land)

I just watched the documentary Waste Land featuring Vik Muniz's project in Brazil at Jardim Gramacho.
Go watch this now! (you can get it on netflix)


I have built a very large curriculum of lessons and resources focused on recycling that hopefully one day sooner rather than later I will be able to organize and share via my blog- but for now go watch Waste Land... recyclable materials, contemporary art, portraits, oh my!
....especially if you are one of the art teachers out there enthralled in bottle-cap murals (or plastic bottle Chihuly work).

And also look into Recycled Reseen (both the DVD and the catalog) - great video to show the kids.

Friday, May 27, 2011

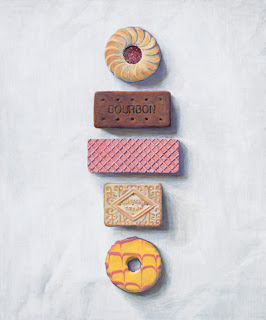
current artist resource to complement the sweet work of Wayne Thiebaud

Look what's on today's Design Sponge blog-roll!


The work of Joel Penkman---> A perfect current contemporary artist to add to your Wayne Thiebaud lessons!

Wednesday, May 25, 2011

Self-Portraits... of feet!


My fifth graders have been working hard on their observational drawing skills this year. I decided to do a self-portrait lesson with a twist after getting inspiration from these photos!

I took this photo one day and then came across these a week or two later:


The first day of this fifth grade lesson we discussed 'self-portraits' and 'portraits' and then discussed how something can be a self-portrait without being an actual picture or drawing of yourself. 

The first day task was for my students to draw their feet as they looked down. 
We discussed how the leg/pants would get smaller and more narrow as it got closer to the foot. 
Then they used their contour drawing skills to draw their shoes. 

Day two the task was to somehow incorporate their favorite book and their favorite snack. 
Some of my kids even thought outside the box and included books they had written in school, a text book of their favorite subject, or had the book open to their favorite chapter. 

After that the students could add in other things that they thought represented them. They used colored pencil and watercolor to add color. 
They are not quite finished but I thought I'd share them. 
(did you check out the madras pants?!)


Tuesday, May 24, 2011

oh heck... i'll add one more version! Britto post #3.


I have one fifth grade class I see for only one half hour a week, I travel to the classroom, there is no sink.
So basically when you count that out- in 30 minutes- with the three minutes it take the kids from the other class to come in, the two minutes it take the students to actually clear off their desks, and one more minute to get settled... we're looking at 24 minutes. Then add on me actually introducing the lesson??!....(you know so the kids actually know what the they're supposed to be doing for the time they have left)... add on another 5 minutes- give or take 3 minutes for my demonstration and 3-5 minutes for my kids to actually get their materials and put their bums in the chairs... we're looking at 15 minutes left.... oh right..... AND we need be cleaned up by the end of 30 minutes too.
So that's 10 minutes of work time. once a week. (if i'm lucky due to testing and school play rehearsals and whatnot.)

As I've said before I am VERY strategic about figuring out what my priorities for objectives to be completed and concepts to be grasped are when time is so precious.

So here we are... my other fifth graders completed the extended Britto/Braque lesson but what do I want this class to be able to get out the lesson with such a limited amount of time?...

I decided to focus on:
Class 1: Observational and Contour drawing.
   Each student did a practice drawing and a real drawing of ONE objet, then traced with black crayon.
   (Also add on a "table line" if they remember to.)
Class 2: Break up the space and Analagous Colors.
   Each student drew lines to break up the space of the object a la Britto, traced in crayon, painted in with
   an analagous set of tempera paints (pre-mixed by me).
Class 3: Break up the background.
   Students used pencil and white craypa to to break up the background- then they used only BLACK
   water color to paint different shades of gray.

These came out great! (I can't believe it!)


Tuesday, May 10, 2011

advanced version of Sol Lewitt continuous line lesson

I led an adapted version of the continuous line lesson I did based on Sol Lewitt's wall drawings a little while back. This one was for a small group of students in an afterschool painting class. 
Each student drew a line in crayon touch two sides on four square papers (6x6).
Then painted contour lines to practice our paintbrush and watercolor control.


We made large backgrounds...

then put them all together!

Also check out Christie's version of bold lines on Fine Lines!

Wednesday, May 4, 2011

Braque and Britto - Part 2... some finished pieces

Here are some of the final results from my Braque & Britto still life lesson using analagous colors, pop art, observational drawing, contour drawing, painting, and other fun elements!

Version A:
Here we worked with the background first... I gave the students the opportunity to choose how they wanted to finish the objects- using black and white craypa.
(I think next time I would do the objects in watercolor.)


Version B:
Here we worked with analagous colors of tempera paint and filled in the objects first. 
The background we filled in with Crayola Slick Sticks---- here I made a discovery**
I had tested these at the Crayola booth last year at NAEA and loved them so I ordered a few packages, I've been very particular about how I use them. 
I was under the impression they were OIL PASTELS... then my students went to watercolor and resist over them... and guess what?... they turn into watercolor paint! It ended up working in our favor, but I had no idea.