Showing posts with label figure drawing. Show all posts

Thursday, October 30, 2014

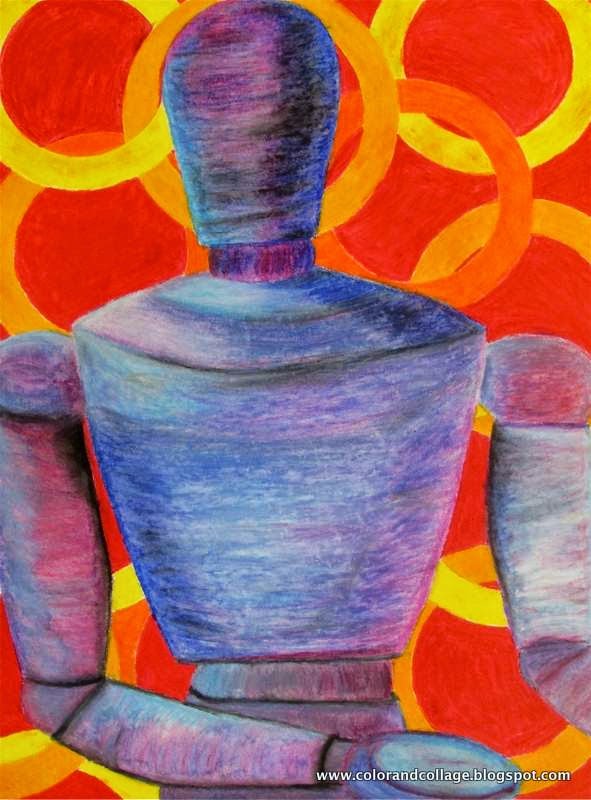
Oil pastel figure lesson differentiated for High School


  A little while back I posted a successful middle school lesson
I did using oil pastels and wood figures. 
The high school art teacher I work with recently used the lesson with her Drawing and Painting I class. The high school students used white 18 x 24 paper (I used 12 x 18 with middle school) and made them really big. The added challenge was to include a complementary color background to make the figures really pop. They are awesome!


Sunday, September 21, 2014

Oil pastel figure close-ups


This was one of my favorite lessons from last year. (I feel like I always say that....?) 

But seriously, this was great. It would work for a variety of grades- elementary or high school as well. I did it with 7th grade and will again this year. 

Using the move-able figures- students had to create a zoomed/close-up composition using the figure, taking the negative space into consideration. I actually had them do a "photo shoot" with their ipads: take photos of the figures in different positions and then cropped the photos. For some students it was easier for them to work from the photo. 


The students sketched out shaded pencil drawings first. Then they drew them BIG on 12 x 18 slate grey Tru-ray construction paper (one of my favorites, along with their turquoise). 
They chose a color palette to work in and had to have 3 different shades of oil pastels so that they could convey the shadows. 


 They all came out awesome! And it gave students a chance to strengthen a variety of skills. Some needed to master blending, some needed to strengthen their ability to communicate dimension, etc. 


Thursday, February 6, 2014

Figure drawing & magazine page color collage


This was one of my first lessons of the year. I didn't know this group of 6th graders so it provided a strong opportunity for any ability and type of learner. 
The students began by doing figure drawing exercises and drawing one another in poses. 
We also did a class project cutting out colors from magazine and working as a class to create these cool color wheels. I did this with all of my class at the beginning of the year. 


Students chose a pose to draw the silhouette of. 
Then they filled in the silhouettes with a color palette/strategy of their choosing based on the color wheel making experience. 


I really wanted to take advantage of getting a fresh start at my new school and with new students. 
So this year I have been having the kids do their own grading sheets at the end of each project.
That way they are able to see all of the objectives they met and how much they just accomplished and learned through the lesson.
Now they are in the practice of learning how to write artist statements and reflect on their art-making process. It has also positively affected peer constructive criticism and classroom discussions with everyone participating willingly. I'm including the pdf in case you are interested. This process of assessment has been working out very well. Now that my sixth graders have done 4 of these grading sheets and writings with specific prompts they can are able to actually formulate thoughtful and more complete artist statements all on their own without prompts this specific.


Monday, August 19, 2013

Ancient Egyptian Portraits made modern


After spending a few classes on head-on portrait drawing
fifth graders switched up their angle and made these
Profile view Egyptian style portraits. 
We looked closely at many examples of Egyptian artwork, discussing notable stylistic details, the significance of head-dresses and skin color, and hieroglyphics.


Sunday, September 23, 2012

Two day transition: Shading to Perspective

We reviewed shading and making lights to mediums to darks flow
with both crayon and colored pencil last week. 


Before explaining perspective and delving in logistically  I developed this did this two day lesson  inspired by this Artsonia image I had pinned which was really successful! 

Pencils, black block crayons for rubbing, rulers, sharpies- that's it! 
In two days the students learned how to measure and use a ruler, create depth, learned more about Keith Haring, and reviewed figure drawing! Woo! 

Day one: Measure with ruler
Students had a practice manilla paper and real construction paper. 
This gave them four chances to get it right if they needed (2 sides, 2 papers)
which they appreciated.
Shading light to dark in each quadrant.

Day two: figure drawing review, viewed a short reel of Keith Haring videos I put together on youtube.
They had to do three practice figure drawing. 
Added on the figure and sharpied it in.

(The design at the top was so clever I could never have come up with this idea myself-
thank god for 10 year old minds!)


More images to come! 

Monday, December 5, 2011

so sweet...

There was a contest in Massachusetts for 3-5th graders based on what they want to be when they graduate from college. I did not have time to do this as a lesson in my class however I wrote up a sheet about the contest with tips for how to approach it and make a successful picture and I offered to mail them for the kids if they brought them to me. To my surprise 17 kids outs of 48 did it all on their own at home! I was even more happily surprised by the quality of work AND their hopes and dreams though.
I HAD to share a few... especially this first one...


Monday, October 10, 2011

skin color crayon strategy


My students have been doing a lot of people drawing lately and I've been repeating my instructions for how to choose an appropriate crayon for the skin color. 
I made a poster of my steps since all of the grades are following the same strategy- thought I'd share it!


Sunday, January 9, 2011

Super Hero Figure Drawing


My fourth graders have recently reviewed portrait drawing with me.  I decided to review figure drawing as well.  I really try to encourage the students to investigate how the body works to create movements- how joints create the bends but bones can't bend.  To practice figure drawing I have them start by drawing a rectangle for the middle of the body and then attach circles for the joints and rectangles for the arm and leg bones.  This gets them to stop worrying about details and stay focused on the placement, alignment, and proportions of the body in different positions.  

This figure drawing practice was followed by a "design your own superhero" project.  The students had to create their character in a superhero pose and carefully draw and color both sides.  As a special surprise I hot glued capes to the figures with the students first initials on the back.  They look great in the case!