

A little delayed- but as promised I am posting the details of and final product photos of my
Growing Day By Day workshop at the MFA, Boston from two weeks ago
based on Ellsworth Kelly and Louise Nevelson.

Visitors at the MFA had the opportunity to come in for a session to create a sculpture out of monochromatic materials to be added to the large rainbow collaborative-installation. Many people came to the museum because they had seen the progress on Facebook & Instagram and wanted to be a part of it!
This project literally worked for ALL ages.
Because the parents/adults were there with the kids age 3-adult was engaged.

The set up:
Notice in this above picture the platform that facilities made for us.
We covered it in construction paper (we didn't have time to paint it) to signify where the colored sculptures would go. This was a huge help for both the first groups of artists so they could envision the plan
and for us who were installing them.
The 6 inch raise off the floor gave the installation a lifted feel and allowed us to attached fishing line to the edges of the platform- and slide tape, etc. underneath as we were installing.
There was a copper wire strung across from the two big beams.
Then fishing line hung vertically and diagonally to the platform for attaching sculptures.


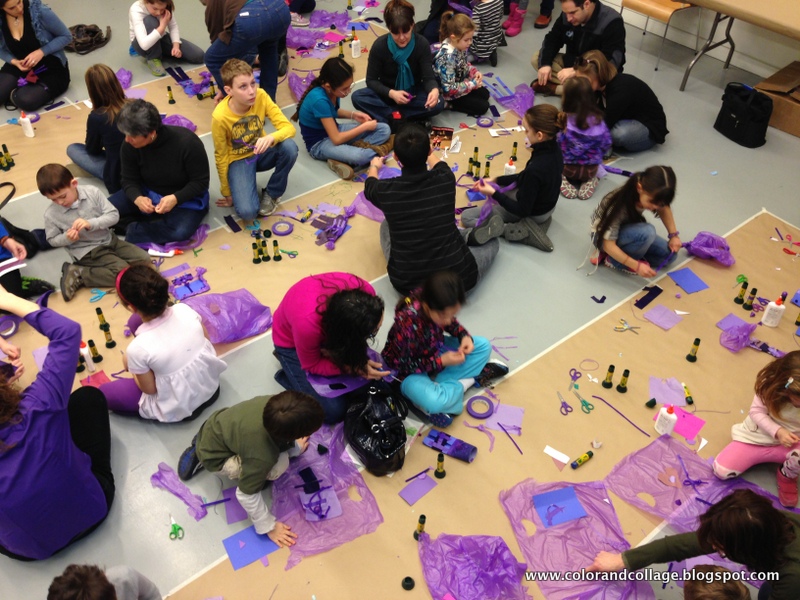
Each child got a "goody bag" with monochromatic materials.
We also got a hold of these awesome bags in each color from U-line.
The artists could use the bags as a material too!
Examples of what was in the bags:
6 x 8" posterboard
tissue paper
pipe cleaners
bottle caps
felt
fabric
raffia
strings/yarn
buttons
foam pieces
popsicle sticks
random recycle center objects


I hosted 5 sessions a day for 5 days. Each session had a color assigned so everyone was working with the same color. This really helped artists focus on the variations in color, tone, and hue as well as focus on the materials. It also helped clean up!!
We only got ONE complaint about having no color choice the entire week!
In addition to focusing on texture and materials I heavily emphasized how a sculpture can be viewed
from different angles in my introduction so participants would take that into consideration rather than just working 2-dimensionally.


To accommodate the most people we surpassed tables and taped long paper to the floor.
Each paper had scissors as well as elmers glue, glue sticks, and colored masking tape (also available through U-line or Dick Blick- U-line was cheaper!) for adhesives. There was a hot glue station to the side for adults.


On the last day we encouraged people to make standing sculptures for the floor in front of the wall or really long pieces we could weave through and dangle from the installation.



The sculptures were attached by masking tape and wire to the fishing lines or to each other.
We hung them up at the end of each session.


One challenge with using the plastic bags as a material was that most people wanted to blow them up and then make either a hot air balloon or a face out of it. The balloon-like sculptures were great for the first day and created a continuous rhythm through out the sculpture but then we really really emphasized other ways you could use it:


Major props to Nora, the family programs manager who advocated for us to do ticketed sessions instead of a constant free-for-all and who was amazingly organized and thorough in planning this with me!
And gigantic shout-outs to Cortney (Nora's intern) who sorted massive amounts of materials by color
and my awesome awesome assistant Lauren who really put her all in the entire week with me!
I also had fantastic help from the teen arts council interns and some of my sixth grade students.
Thank you guys!
I couldn't be prouder of this!


