

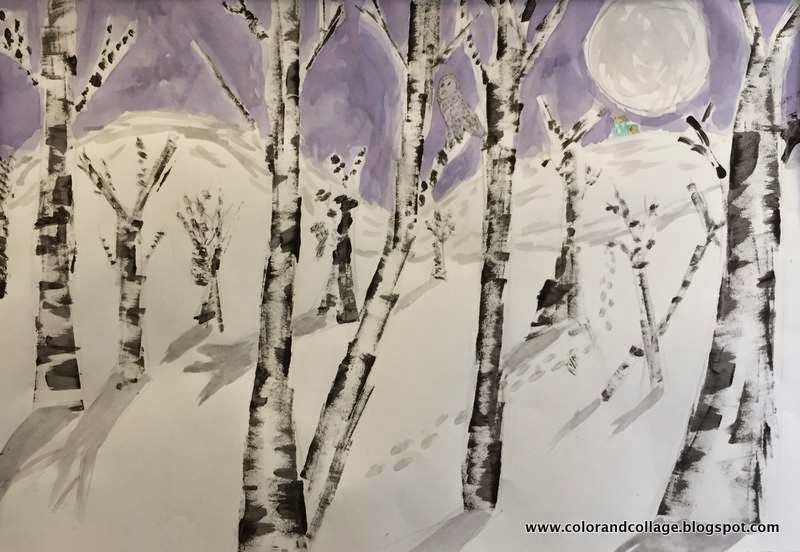
This was a very successful
mat board / cardboard strip black paint smearing/flicking birch tree project
that I elevated so that it was appropriate for 6th grade and more challenging than I've done previously.
As (hopefully) all of you know, the birch tree trick project is a no-fail project that makes every student feel like a super-duper artist. The objective this time around was to
create a full landscape that demonstrated great depth and shadows.
Before I start- I am so close to 200 followers(!) so please pass this along to friends
or colleagues so that I can hit a new milestone.
(I think it will also motivate me to do my blog design overhaul sooner rather than later.)
The lesson:
This was my favorite of my photo and print examples.
It is a woodcut called "Northern Shadows" by Lisa VanMeter
who has many beautiful woodcuts and tree-themed work on her website.

Project breakdown:
-Drawing-
1. Sketch closest trees
2. Add in horizon line and hills.
3. Sketch in the rest of trees ( I required a minimum of 6.)
4. Draw in moon and shadows.
5. Add in extras: houses, animals, footsteps, etc.
-Painting-
1. Use cardboard or mat board pieces to scrap thinned black tempera for the birch.
2. Paint in sky with liquid watercolor.
3. Paint in shadows and create a "chalky moon texture" with a very light black wash.
4. Use watercolor pencils for tiny things like houses, pine trees, animals.
*To expedite the process I had three sky color options pre-made
and the shadow paint pre-mixed and ready.


For elementary teachers I have a "wicked" old version of this project and a round-up of many other winter project ideas here.
These are So Pretty! Yet one more birch lesson for me to "pin". I love the soft shadows.
ReplyDeleteLove!
ReplyDelete