Wednesday, November 30, 2011

Finally some finished ones...!

Some of my fifth graders have (finally) finished up their Beatriz Milhazes-inspired projects
I was a little nervous they may not follow through all the way to the end full steam ahead - but here are are a few that definitely did not disappoint with their complex compositions! 


Sunday, November 27, 2011

more giraffes :)

Couldn't resist posting some more giraffes....


making some colorful progress

Moving along with our Beatriz Milhazes-inspired oil pastel color blending - stencil lesson.... 
we've added on some more color blending tricks- trying to decipher strategies for making shapes appear either 2-D or 3-D, closer and farther away, as well as some cool color tempera cake paint. 


Wednesday, November 23, 2011

Big Belly Balloon Breath... and more mesmerization

I spent my entire past weekend at at a training to get my certification in teaching children's yoga by
Childlight Yoga. It is something I've had on my back-burner for the future but the training happened to be a weekend I was around (with no weddings or work or family events or anything!).. so I bit it and did it.
Well- it was really great. Although I'm not quitting my school teaching job tomorrow to start to do this- there were still a lot of strategies and exercises and TONS of resources that I can apply right to my art room and pass on to some other teachers.


I will probably be posting a lot more about this experience and my application of my newfound teaching tools and yoga-based adventures but I wanted to share this:

Knowing this week especially was going to be a potentially cuckoo one for kiddos and since I've been experiencing a very high amount of the whining/complaining/tattle-tailing lately I decided to try a breathing exercise to encourage some personal focus for the kids.
It is called 'balloon breathing' - but I called it a "Big Balloon Belly Breath" to the kids which go their attention immediately. First I imitated how when we take a breath and we hold it in our cheeks like a balloon we are trapping the air but it gives us a head ache and doesn't help our body.
Then I explained how we are trying to get the air we breathe into travel all the way down to our belly and inflate our belly like a balloon.
We all hold our hands on our bellies or just in front- we inhale, blowing up the balloon (pushing our hands out like we're holding a filling balloon) and then exhale, deflating the balloon. We first exhaled through our mouth and then tried through our nose.

This was REALLY effective with the kids- (I was just as surprised as you are right  now)- they were very receptive and like doing it as a group. We talked about how you can only breathe for yourself and not for anyone else so doing these big belly breaths helps us to focus on us and not worry about others. phew! 

I also was introduced to this wonderful song- "Colors" by Kira Willey!
I played it twice through as a transition background song as they sat down and went to work. 
Magical! (download it now, seriously- its from her Dance for the Sun album)
Here's a youtube video of it:

And some bonus videos for you... 
Found these on youtube- showed them to my little ones yesterday.... they loved!

(2 mins) Color-mixing claymation with beautiful Jenny Owens Young song:

(2 mins) Little Yellow & Little Blue with claymation - great music by Said the Whale:

Sunday, November 20, 2011

Go See This!--- "Being Elmo"


My boyfriend and I went to see the documentary "Being Elmo: A Puppeteer's Journey" last night at the Brattle Theater in Cambridge. It is about Kevin Clash (the voice of Elmo), his quest to be a puppeteer, his career, puppet/muppet creation, Jim Henson, and Elmo's evolution. 
It was FANTASTIC. It is only an hour and fifteen minutes- a very interesting and wonderful story!
The bonus is that the puppet making and puppeteering insight is fascinating (-especially if you are an art teacher or fiber artist....) 


Thursday, November 10, 2011

Giraffe in the Jungle


It was funny MaryMaking posted about her Jennifer Mercede giraffe inspired lesson today because I was about to take photos of my version! 
After that I couldn't resist to post them even though they are not quite finished. 
(These are also not my best photos...)


 We began by drawing the giraffe from the front view. The kids drew designs in the spots. They carefully colored their new best buddies in with oil pastel. 


The next part of the lesson was for the kids to learn how to make 'real' trees instead of lollipop trees. We glued craft paper on to turquoise construction paper to make the trunk and branches.

Part three the kids thought was totally separate but little did they know what I had in store!
They looked at the branching- vein design found on leaves. 
We used this as a jumping off point and then the kids added other designs using sharpie and colored them in with construction paper crayon.
The other surprise was that the kids were recycling our used table paper. They could choose to use either the painty side or the clean side. 

Then using the "batik" same process as I've posted before with crumpling craft paper/grocery bag in water, flattening, an painting with watery green tempera cake paint - we transformed our old table paper into abstract batiked paper. 


 The students traced leaf shapes onto the back of the paper, cut them out, and added them on to their trees. 


Today we began to attach it all together. 
We still have to finish some things up but here are some previews!


Tuesday, November 8, 2011

Spheres, Stencils, Shapes, Swoon & Beatriz Beginnings


As I have said before my school is new this year- so my fifth graders are coming from a variety of educational and art educational backgrounds. Generally I have to assume they do not have a solid foundation so I give them big props for a lot of their accomplishments with me this year knowing this is the first go around for many of my students with these materials and concepts. 
I'm trying to really layer my projects with mini-lessons that cover a lot of turf. 

This project I am very excited about. 
The first day I set up dodge balls on the tables and we reviewed 
2-D shapes vs. 3-D forms.
We also reviewed how a shadow occurs (light source, object, surface). 
This is the basic worksheet we followed. 
We filled in the Medium box first, then the light, then the dark. 
One circle was for a 2-dimensional shading using medium pressure. 
The bottom circle was for their first try at shading spheres: 


 Day 2: I showed my students this 8 minute YouTube video of Beatriz Milhazes, a Brazilian contemporary artist. It's a great video, I recommend watching it even if you don't show it to your students!
In Beatriz's interview she talks about her influences for her shapes, her process, and artists who influenced her like Mondrian and Matisse. 
After the video we reviewed Organic vs. Geometric shapes and lines. 
Each student made one organic and one geometric stencil out of a manilla folder. 

Day 3: Students traced 3 circles on a grey construction paper. 
They also traced each stencil at least two times and could use a ruler or other people's stencils to finish their composition.
Each student then chose a color set to make one circle into a 3-dimensional sphere:


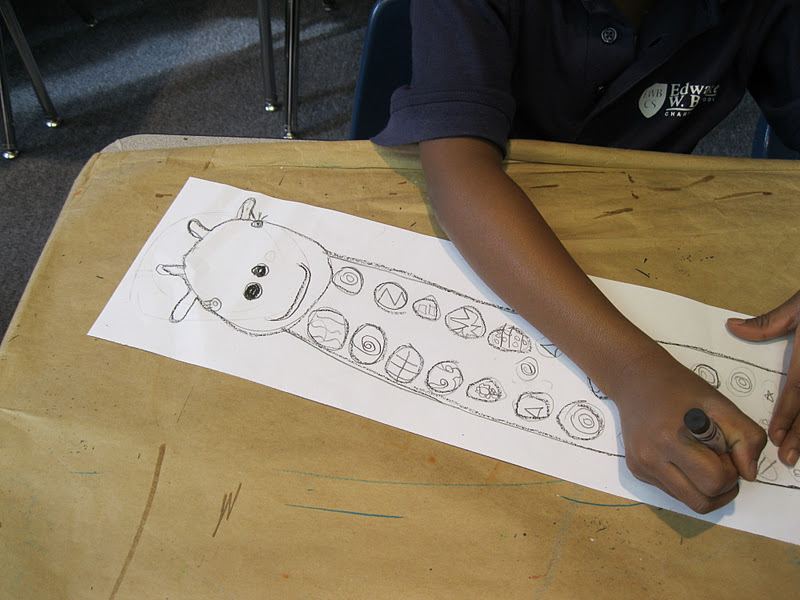
Student progress so far:
More oil pastel and some painting to come!

I also have a field trip to the Institute for Contemporary Art, Boston scheduled for the students in a few weeks. They will have an introduction to contemporary art and also get to see this new mural and cut paper stencil installation by Swoon. This is another reason I wanted the students to understand the concept of a stencil. 


Monday, November 7, 2011

crumple paper Ehlert mice

My kinder students are doing a study of Lois Ehlert with me. 
We have read a few of her books and they watched the video 
"Color World" which shows how she gets her ideas and makes her art. The kids love it. 
It's pretty non-existent at this point but you can buy a used VHS cheap on Amazon. 

This year I put brown craft paper on my tables (and plastic/vinyl tablecloths over them for wet/gluey stuff). I was about to recycle the paper when another art teacher said to me that she saves them because the paint stains look cool. I'm surprised this did not occur to me a long time ago to be honest. 
So- I have been saving them. I cut the paper up into roughly 6 x 8 pieces for this lesson. 
(I usually recycle grocery bags for crumpled brown paper projects but this was also a great way to recycle and the kids felt really invested in it being their paper to begin with that they were reusing.)

The students traced the outlines of the mouse shape and ovals for the ears on one side. 
Then all together I told them to CRUMPLE up the paper- they couldn't believe it. 
They flattened it out and on the OTHER side they did a rubbing with orange, yellow, brown crayons.
Then we crumpled AGAIN -especially so they could feel the difference in the softness of the paper.  
They flattened them out and did rubbings with black crayons to emphasize the texture. 


 They thought crumpling up our papers was the funniest thing ever:

Today we reviewed what collage is how Ehlert makes her work.
The kids cut out their teardrop shape and two oval ears. 
They glued them on 6 x 6 backgrounds, and we added eyes, tails, and some cheese. 
They look just like the little mouse hiding in "Leaf Man" by Lois Ehlert. 
So simple but they LOVE them! (I love them...)