Thursday, April 11, 2013

Paper Marbling


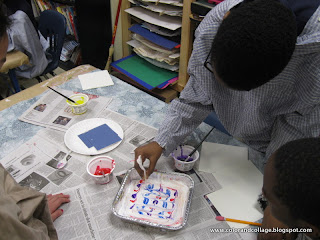
Somehow after thinking I've tried everything I realized I've never tried or taught paper marbling with shaving cream. I rounded up the information from a handful of websites and posts so I'm not going to link you to one specifically. Hopefully my pictures are helpful for those wanting to try it though. 

I did this with 6th grade- I did a demo and then they broke into groups of 3-4.
A great teamwork activity!


**For the paint: I slightly watered down my already watery cheap-o tempera paints that I have no use for. My sample with tempera cakes worked also.

Other materials:
Shaving cream (barbasol is fine) 
Cut up mat board or cardboard as the "squeegees" 
Forks, knives, sticks, straws, or "sporks" as we have at school - for dragging the lines.
Tin foil trays
Paper cut down (I had two per kid- 6 x 6")


Spread the shaving cream out in about a half inch layer like frosting

Emphasize to the kids that they should apply the paint in a strategic way. 
The "confetti" approach as I call it albeit fun to do does not come out as cool. 


Demonstrate dragging a tools through the paint puddles going back and forth in one direction-

and then going the opposite cross direction for the next round.


Press the paper down into the paint/shaving cream with medium pressure.
Scrape the shaving cream off with the squeegee tool. 
We had lots of newspaper to keep the tables clean and not overwhelming as we went along.
The kids waiting on their turn to print the paper are helpful for making sure there is an open newspaper to place the shaving cream covered paper down on for scraping. 

You can build off the color remnants in the trays rather than rinsing it all out every time.


... and OF COURSE I forgot to take a picture of the final product after I wiped off the shaving cream. 

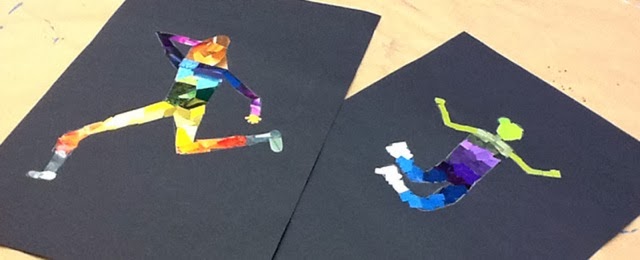
But I do have this lovely picture of a bunch of samples:

Tuesday, April 9, 2013

Add these to your wishlist!

frida kahlo

I attended the Hello Etsy! conference a few weeks back at Pratt in Brooklyn.
(As some of you may know I have recently launched a watercolor wedding stationery business called Strawberry Small Works Studio and have been selling on Etsy.)

In the bathroom I noticed a woman with a bag that said "Snack Mountain" on it- a branded name and concept my good friend from college pioneered for her senior thesis she still has in action. If you are looking for a few entertaining videos or more contemporary imagery to show alongside Claes Oldenberg food sculptures for a lesson definitely check out her work:
http://blog.snackmountain.com/


But back to my story---
the woman I met happened to be friends with my friend Lauren and has started a company called Late Greats. Chen is awesome and has a website and etsy store where she sells her hand-made stuffed historical figures.How fun!
Why wouldn't you want Frida or Pablo hanging out in your classroom?? Or better yet waiting for you atop your bed and throw pillows when you get home?
Check it out:
website: http://www.lategreats.com/
etsy: https://www.etsy.com/shop/lategreats


pablo picasso

Monday, April 8, 2013

Romare Bearden's Rock Stars


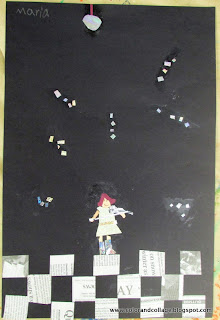
First grade made these super fun collages while studying about Romare Bearden's life and artwork. 
Did you know he was an artist, musician, baseball player, in the army, and had a teaching degree?
So interesting!

There are an abundance of great resources for teaching meaningful in-depth lessons about Bearden. The National Gallery of Art has a fantastic booklet in pdf form (click here ), lots of information on The Bearden Foundation website, and there is a Dropping in on Romare Video (best for grades 2-4) but great for examining his work in depth. 

In the Dropping in on video they show Romare's cat and then you realize the cat is in some of his art works as well. We added his cat to our pictures which is why there is a random cat on some of the rock and roll sets. Some of the kids dressed the cat up as well. Pretty hilarious. 

Early Carolina Morning
Using the checkerboard floor inspiration of Early Carolina Morning the kids started by making 3 rows of checkerboard by gluing down squares of cut up newspaper. (Some of them didn't quite get it as you can see- but for the ones that did it looked really cool.)

Using jazz music and performing musicians as our inspiration the students made musician collages. 
I had photocopies of instruments the kids could cut out for their collage. They had to create a person with the instrument in mind so that the position of the arms made sense. 


Empress of the Blues


Materials we used:
-Newspaper squares for the floor
-Clothes: either fabric or wall paper scraps
-Skin: I bought Roylco skin color paper this year- it has been great for lots of projects.
-Photocopies of pictures of guitars, banjos, brass instruments
-Construction paper scraps
-*** The real crowd please was the hologram paper for the disco ball.