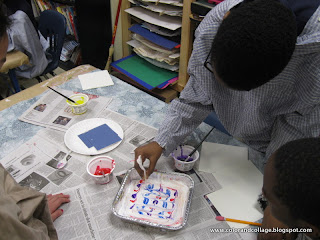
Somehow after thinking I've tried everything I realized I've never tried or taught paper marbling with shaving cream. I rounded up the information from a handful of websites and posts so I'm not going to link you to one specifically. Hopefully my pictures are helpful for those wanting to try it though.
I did this with 6th grade- I did a demo and then they broke into groups of 3-4.
A great teamwork activity!
**For the paint: I slightly watered down my already watery cheap-o tempera paints that I have no use for. My sample with tempera cakes worked also.
Other materials:
Shaving cream (barbasol is fine)
Cut up mat board or cardboard as the "squeegees"
Forks, knives, sticks, straws, or "sporks" as we have at school - for dragging the lines.
Tin foil trays
Paper cut down (I had two per kid- 6 x 6")
Spread the shaving cream out in about a half inch layer like frosting
Emphasize to the kids that they should apply the paint in a strategic way.
The "confetti" approach as I call it albeit fun to do does not come out as cool.
Demonstrate dragging a tools through the paint puddles going back and forth in one direction-
and then going the opposite cross direction for the next round.
Press the paper down into the paint/shaving cream with medium pressure.
Scrape the shaving cream off with the squeegee tool.
We had lots of newspaper to keep the tables clean and not overwhelming as we went along.
The kids waiting on their turn to print the paper are helpful for making sure there is an open newspaper to place the shaving cream covered paper down on for scraping.
You can build off the color remnants in the trays rather than rinsing it all out every time.
... and OF COURSE I forgot to take a picture of the final product after I wiped off the shaving cream.
But I do have this lovely picture of a bunch of samples:


No comments:
Post a Comment