Showing posts with label drawing. Show all posts

Thursday, February 12, 2015

mid year middle school art show


Last week I put on a mid-year art show just for middle school. This is the my second year at this school (the school is PK-12, I teach 6, 7, 8). My first year I hoarded all of my students work until the art show at the end of the year because that was the departing teacher told me to do.  Going into this year I had a better grasp of how much the kids would actually produce (more than I anticipated) and how much work I would need at the end of the year all-school show. The other thing I realized was that the parents basically forgot the kids even took art until the end of the year. This year I took on some new initiatives to make my art program more visible to parents and the campus:
-I have implemented Artsonia... it is awesome. 
-I sent home a couple pieces of artwork with each child before Christmas. 
-I held a middle school only art show in February in the middle school building.

Here is the breakdown of the art show projects. 
Our theme was LIGHT. 

Grade 6: 

 Acrylic Lighthouse Paintings on small canvases
inspired by Edward Hopper


 s
Grade 7:

Lamps and Light Fixtures
 Acrylic paintings on small canvases
Inspired by the Rumi quote,
"The lamps are different but the light is the same."


 Interior Spaces using 1 point perspective


Grade 8:

Students completed the sentence "Let light shine on _____ because _____." 
They had to choose an issue in the world of importance and should have more light shine on it. They chose a symbolic image to represent the concept.  


In a different room I had a "Special Exhibition" of 8th grade art. 
These were geometric relief sculptures the students worked very hard on.
It was really nice to be able to highlight their hard work and make the 8th grade feel special. 


Detailed posts of the projects will be up asap!!

Thursday, October 30, 2014

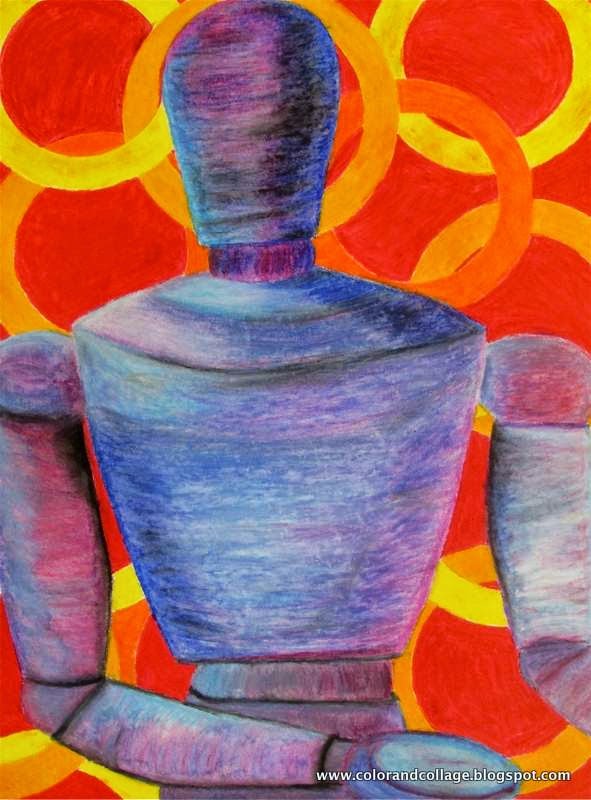
Oil pastel figure lesson differentiated for High School


  A little while back I posted a successful middle school lesson
I did using oil pastels and wood figures. 
The high school art teacher I work with recently used the lesson with her Drawing and Painting I class. The high school students used white 18 x 24 paper (I used 12 x 18 with middle school) and made them really big. The added challenge was to include a complementary color background to make the figures really pop. They are awesome!


Friday, May 9, 2014

Chinese Brush Painting and Perspective


My seventh graders are in the middle of an Asian-influenced unit. 
To begin the unit I introduced them to Chinese Brush Painting. 
My school has lower, middle, and upper school are all on the same campus.
So I was very lucky to have the chance to have one of the high school Chinese students,
who had learned traditional brush painting when he was younger, came and did a demonstration for my classes. 


Before we started the main project, for one class session I cut down small 6 x 6 pieces of rice paper for the kids to practice on. They practiced bamboo, trees, mountains, for the most part. I have a few Chinese students, and they showed the kids how to write their names in Chinese characters as well, which they loved. 

Tips:
I had inexpensive chinese brushes on hand but most of us liked to use these size 6 and 8 round white nylon watercolor brushes by Sax instead. 
The ink can be watered down with a little water on a small palette to get dark grey in addition to black. Most of the kids shared a tiny cup of ink and a tiny cup of water. 


The project:

From there we took a break from brush painting and the students learned how 2-point perspective works. After practicing this new concept, they each had to select a photo of Chinese or Japanese inspired architecture that demonstrated 2-point perspective to draw. 
They drew the buildings on 9 x 12 paper. 

Then they placed the rice paper over their drawing and traced the drawing in ink. 
This part of the process was the least time consuming and only took 1 to 2 class periods. 


To give them a finished look, we back them with construction paper and popped them in pre-cut mats. They look awesome and the kids learned so much! 

Monday, April 21, 2014

Middle school self-portraits with style

Self-portraits!


These were done by my sixth graders. 
I wanted to squeeze in portraits but I was in a time crunch
so I went for a graphic design, limited color palette approach. 
Their practice drawings included shading but not the final products. 
I gave the students the option to do sunglasses in lieu of eyes but surprisingly only a few of them took me up on my offer. 

The backgrounds were inspired by Beatriz Milhazes. 
The kids were limited to sharpie, fat black marker, grey marker, and one color. 
After this project we dove into a unit focused on the principles of design, so this was a great segue from the last unit focused on realistic drawing into the new one. 


Wednesday, March 5, 2014

4 part still life project - middle school

4 Part Still Life Exploration with 8th grade
on 18x24 paper split into 4 9x12 sections

Students chose their still life object.
It had to be bigger than their hand with limited text.
I steered them away from stuffed animals and fuzzy/furry textures. 

I would absolutely do this project again and keep the order in which I introduced the parts. 

This was wonderful for differentiation-
it allowed all levels of students to learn a lot, better their skills, and feel comfortable. 


1. Realistic pencil drawing of the entire object with shading. 
(2-3 class periods)

2. In the style of Romero Britto. 
(3 class periods with introduction/quick slide show)
Students must zoom in on the object, with the option to abstract it. 
Using marker they broke the section down and filled it in with bright color to make it pop. 

(toaster abstraction)

3. Collage
(3-4 class periods depending on type of collage they chose, with slide show)
Students could choose the composition for this section- with the option to zoom & crop or showcase the entire object. 
I showed LOTS of examples of different types of collages. 
They could choose their materials- I suggested magazine cut outs, newspaper, or tissue paper. 
They had to include a background. 


4. Acrylic painting
(2 class periods with introduction to painting/demonstration)
This was the final section of the four.
Students had to look at their image as a whole and figure out what type of composition was needed in order to make the entire paper feel balanced. 
Most of them have never used acrylic paint before. 
Color options and backgrounds were up to the them. 
Students decided if they wanted to paint the object in colors true to life or not.


Suggestions if you are limited on time:
- you can cut down squares & stripes ahead of time
to collage for stripe or checkerboard backgrounds
- select the objects ahead of time and limit the objects they can choose 

More finished examples to come!

Tuesday, February 25, 2014

Polar Bears - drawing with charcoal, shading things that are white


A common request I get from students is to learn how to draw animals, so I decided to fulfill it. 
This lesson served a variety of purposes (i.e. exposing students to new drawing tools and shading white objects) and providing the students structured freedom. 
The great amount of the choice the students led them to take great care
and pride in their picture right up to the end.
I did this with 6th grade but I would recommend it for 4th-6th.
Some of the introductory images I provided the students can be found on my pinterest board here


The requirements were:
-to work from a photograph with a full polar bear
-choose white or grey paper to work on
-start with pencil
-demonstrate shading & texture
-it needs to be apparent the bear is on a ground and not flying

The options were:
-drawing pencils
-charcoal pencil
-pressed charcoal
-white colored pencil
-white chalk


Most of the students tried out the charcoal at least minimally. This lesson worked great because the more adventurous students were able to be more experimental and the more apprehensive students were able to work more cautiously. 


Some of the introductory images I provided the students can be found on my pinterest board here

Thursday, February 13, 2014

Drawing clothing with middle school


My sixth graders produced these wonderful drawings in the fall. 
It was an introduction to drawing pencils, shading, value, drawing from life/observational drawing. To get them engaged right off the bat, students could bring in an article of clothing they wanted to draw (I discouraged ones with large logos/cartoons, or complicated patterning). 
We then hung them from the ceiling! 


The focus was on drawing the folds, wrinkles, and nuances of the fabric. 
I emphasized that clothing without a human body inside of it will look different than if someone was wearing the garment so it was important to draw what they see rather than what they think it should look like. 


Lastly, to add a bit of color, but to continue with the pencil train- the kids used watercolor pencils to fill in the background. They had to choose colors that would blend together. 


Monday, August 19, 2013

Ancient Egyptian Portraits made modern


After spending a few classes on head-on portrait drawing
fifth graders switched up their angle and made these
Profile view Egyptian style portraits. 
We looked closely at many examples of Egyptian artwork, discussing notable stylistic details, the significance of head-dresses and skin color, and hieroglyphics.